DIY Website Photography: Professional Shots Without a Professional Budget

Scroll through enough small-business websites, and you’ll start to notice something about the photos…
Bland backgrounds. (yawn)
Clearly staged interactions. (side eye)
Smiling models with suspiciously great teeth doing, well, nothing in particular. (full eye roll)
That’s the kiss of stock photo overuse, and shoppers pick up on it, too.
Despite the somewhat common misconception, you actually don’t need pro-level gear (or the budget for a pro) to create images that feel real and trustworthy for your website.
With the right techniques, minimal gear, and thoughtful settings, you can capture headshots, products, services, and even your team in ways that elevate your brand.
Here’s how.
Why Website Photography Matters
A Cornell study found that shoppers have more trust in high-quality, custom photos than low-quality custom photos or stock images.
Why could that be?
If your site is overloaded with stock photography, it may signal that you don’t want to show the real people or products behind the business. It can, at best, look cheap and low-effort, and at worst, inauthentic and untrustworthy.
But just like everything else in this guide, you don’t have to have a massive budget to fix this.
Follow along as we walk you through everything you need to know to create strong DIY photography that makes your site feel real and credible.
How To Take Headshots That Feel Human (And Professional)
Your headshot as the owner/operator of your small business is often the most trust-building image on your entire website. It proves there’s a real person behind the brand.
Before you dive into the specifics of capturing this shot, plan ahead for all the ways you might want to use it.
You may want a really approachable image for your website’s About page, then an additional more formal one for LinkedIn. However many styles of headshot you want to end up with, shooting them in the same session is wise to keep your branding cohesive.
With that in mind, let’s dig in.
Headshot Gear
The first thing to note is that you can absolutely use a modern smartphone for quality headshots.
- Most phones from the last several years produce excellent images, especially in natural light: If you go this direction, we recommend using the equivalent of portrait mode, positioning yourself so the image captures from your armpits up, and standing a few feet away from your background to create depth.
- But if you do have a camera and want to use it, a 50mm lens is ideal: This is because it mimics how the human eye sees faces and creates a soft background blur that keeps attention on you.
We think lighting matters a little more than the camera gear.
- The easiest and freest lighting source is a large window: Stand facing it so the light hits your face evenly. Avoid overhead lighting, which can create harsh shadows under your eyes.
- For a small upgrade without spending much, consider a consumer ring light or LED panel: You should be able to find one for $50 or less. Look for one with adjustable brightness and color temperature, and change it as needed depending on how your test shots come out.
- Another small but key piece of gear is a tripod: A necessity if you want crisp and consistent results across all your DIY photography. You can find lots of tripods, from tabletop to full height, used and brand new online.
Once it’s on the tripod, you can use your phone or camera’s timer function to eliminate shake. And to avoid having to run back and forth between every shot, consider an inexpensive Bluetooth remote to take multiple photos back to back. Some smartphone cameras can even be triggered from connected devices (for example, you can take an iPhone photo via your Apple Watch), so you don’t need to buy another little fiddly piece of tech.
Presentation & Props
Dress in a way that matches your brand identity.
For example, as a financial advisor, you might lean into polished attire. A more creative founder might opt for something relaxed. Whatever you choose, do so with intention.
Props can add personality and context to a headshot. If you run a small coffee roastery, holding a mug in a seated headshot can feel natural. If you’re a designer, maybe your headshot could feature your fancy digital tools opened up on your computer in the background.
Choosing the Best Setting
For pro-looking DIY headshots, look for a clean wall or an environment related to your work. What you want to avoid is visual clutter that distracts from your face.
Editing Headshots
If taken with a good device and lighting, you shouldn’t have to do much, if any, editing to your headshots.
But if you choose to, there are about a billion photo editing tools to choose from. Adobe Lightroom is a popular option, but you will have to pay for a subscription to access its full power.
Whatever you do, avoid heavy smoothing filters that remove natural-looking texture. Excessively editing photos gives them an artificial look that people can pick up on almost instinctively, which can backfire when the whole goal is to build trust.
We’ll say here that the editing style you go with should be reflected across all the photos on your site, and should align with your brand tone. Keep that in mind before you’re tempted to go high-contrast and moody with headshots, then suddenly shift to soft and bright with your product and/or service shots.
Communicate Quality With Product Photography
If you sell physical products online, your photos need to stand in for the in-store experience.
When customers cannot touch, feel, or examine your item, your images must do that job for them.
In that case, let’s get to work.
The Gear You Need
Again, your smartphone is more than capable of excellent results.
- Position your phone so that the product is clear and centered on the screen, turn off flash and avoid zoom, and tap your screen to bring your subject into focus.
- If you’re using a camera, choose aperture priority mode and set your aperture to around f/5.6 to f/8 for sharpness. Keep ISO as low as possible to reduce grain.
A tripod isn’t as necessary here as it can be for other types of photography, but if you already have one — or have shaky hands — it can be great for eliminating blur and maintaining consistent framing.
Lighting is, say it with us, fundamental!
- Natural window light is great, as well as an affordable ring light or panel.
- Diffuse harsh light with a sheer curtain.
- On the opposite side of the light, use a white poster board as a reflector to bounce light back and reduce shadows. This simple setup can look surprisingly professional.
Background Tips
Choose neutral backgrounds that let your product stand out. White foam boards, softly-colored textured fabric, and wooden surfaces all work well.
You can get creative here, but avoid busy backgrounds that compete for attention.
What To Shoot
Research finds that high-resolution product images shown from multiple angles can generate up to 90% more engagement compared to photos that are low quality or limited to a single view.
With that in mind, create a short list with every possible angle customers may want to see. And don’t be afraid to dig into the deets. For example, if you sell luxurious shoes, why not show them from every angle, inside and out, on the foot, and out and about?
Help shoppers imagine your product in their lives, and anticipate any questions they may have to reduce friction and increase conversions.
Accessories & Props
Props should support the functionality of your without overpowering them. For example, if you sell kitchen tools, show them in use within a clean, realistic cooking setup. Just like with headshots, avoid clutter that competes for attention.
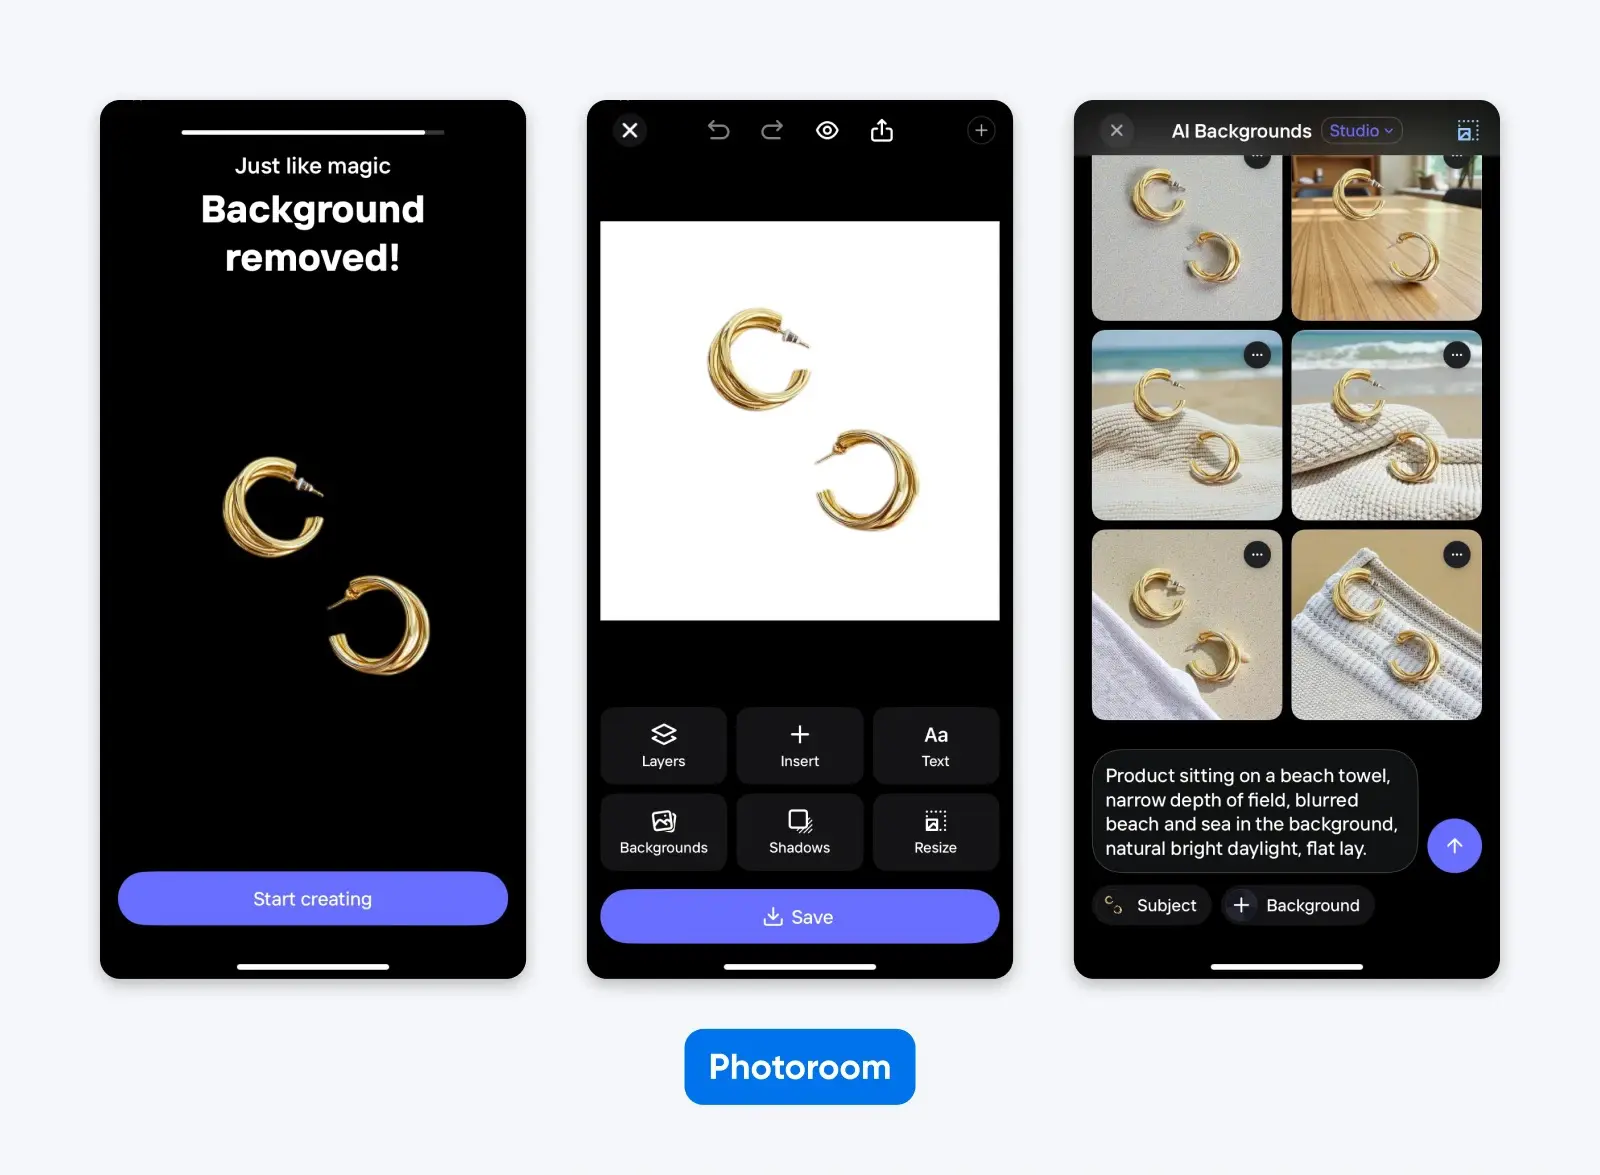
Editing
Editing should focus only on accurate color and clarity. Feel free to sharpen up the focus and remove distractions (look for photo editing tools with “eraser” functionality), but avoid edits that change the product’s true appearance.
Capture Your Services in Action
Services being intangible makes visuals even more important.
If you sell a service, there are prospective clients out there who want to see what working with you actually looks like.
Here’s how to show ‘em.
Get Your Gear Together
Pretty much the same gear principles apply here as always. A modern smartphone can do the job nicely.
However, this is one area where a camera may have the upper hand, depending on your industry.
- If your services tend to be more fast-paced — maybe you’re a dog groomer or own a gym — a camera can be set up to avoid blur: We recommend using a fast shutter speed like 1/200 or faster and keeping ISO moderate, adjusting as the light changes.
- Lighting should be soft and even: Natural daylight works beautifully. If indoors or shooting on a dark day, position subjects near windows and supplement with a small LED panel if needed. When you need to use overhead lights in a large or darker space, just avoid positioning faces or important elements of shots (like hands) right under them to avoid shadow.
- Especially for those faster-moving service shots, a tripod is going to be your best friend for stable and consistent pictures: And if you’re taking your own action shots? You’re gonna need a remote or other connected device as well.
Scenes To Capture
Focus on storytelling rather than posed shots when it comes to services.
Capture real engagement. A consultant reviewing documents with a client feels authentic. A hairstylist going at a head with shears in hand demonstrates expertise.
Technically, take wide shots to provide context, mid-range shots of interactions, and close-ups to show off details where it makes sense. This variety provides a sense of action even in still photography.
Optional Props
We really strongly recommend not overdoing it here. Authenticity is key, so if you don’t know what props to use, you may want to avoid them altogether to avoid coming across as posed and fake.
That said, generally props should reinforce your brand as well as professionalism. Consider organized tools, clean workspaces, and branded materials for your services shots.
Editing Action Shots
As with headshots, great pictures of people shouldn’t need a lot of editing. If they do, you probably don’t want to use them.
Editing photos of your services is more about selecting the best ones. Choose authentic and clear images, just applying a tiny bit of cropping and sharpening to those that are almost perfect.
Bonus: How and Why To Feature Your Workspace and Team
Especially in the age of AI, people using the internet to shop for goods and services are thirsty for signs of legitimacy before parting with their money.
Environmental photography featuring your workspace and team — if you have one — reassures visitors that your business is real and worth their hard-earned cash.
Before taking environmental shots, consider what your unique visitors actually want to see. Depending on your industry, they might be curious about your quality, durability, experience, speed, professionalism, creativity…the list goes on and on…
A note: If you’re not sure that photographing your current environment will convey a trustworthy impression of your business – maybe you’re currently in a dingy space, or in the process of hiring a new team – it might be worth forgoing this step until you’re ready to show off.
Gear Guide
A couple of things to keep in mind:
- When using a camera instead of a smartphone, keep your aperture around f/8 for wider room shots so more of the space is in focus: Avoid extreme wide-angle lenses that distort lines.
- Lighting is best if it’s bright but balanced: Combine natural daylight with warm interior lighting if the space isn’t bright enough, and pictures are coming out muddy or blurry. As always, we’re avoiding casting any harsh shadows, so keep that in mind before flicking on any switches.
You don’t really need a tripod here unless you’re worried about capturing stable shots. A remote or other connected device may be helpful if you want to feature yourself in your environmental shots.
Setting Up the “Set”
Start by reducing visual clutter in the area you’re going to photograph. Remove unnecessary items from desks. Hide that big ball of tangled cables. Straighten chairs.
At the same time, don’t fake a pristine or sterile environment if that doesn’t tell your true brand story.
When staging, the most important factor is composition. Make sure lines are straight, horizons aren’t tilted, and key elements aren’t awkwardly cut off.
For ideas on what exactly to capture, consider some wide shots of your workspace, a candid team collaboration moment, and a few detailed shots of branded materials and finished work.
Editing Your Shots
Quite similar to any service shots you might have taken, environmental photos are less about perfection and more about clarity and thoughtfulness.
Does it tell your story, is it enticing, and is it crisp and clear? Then it’s probably a great shot to use, very little editing required apart from some sharpening, straightening, and cropping.
Authenticity Can Upgrade Any Website Photography
Your website visuals are often the first impression a customer gets.
How can you make sure it’s a good one?
Authentic photography is the key to transforming your website from a generic billboard in a sea of other small businesses into an eye-catching, credible, and engaging marketing powerhouse.
With some thoughtfulness, planning, and a dash of creativity, even DIY headshots, product photos, service captures, and environmental shots can show visitors who you are, what you do, and why they can – and should — trust purchases from you.

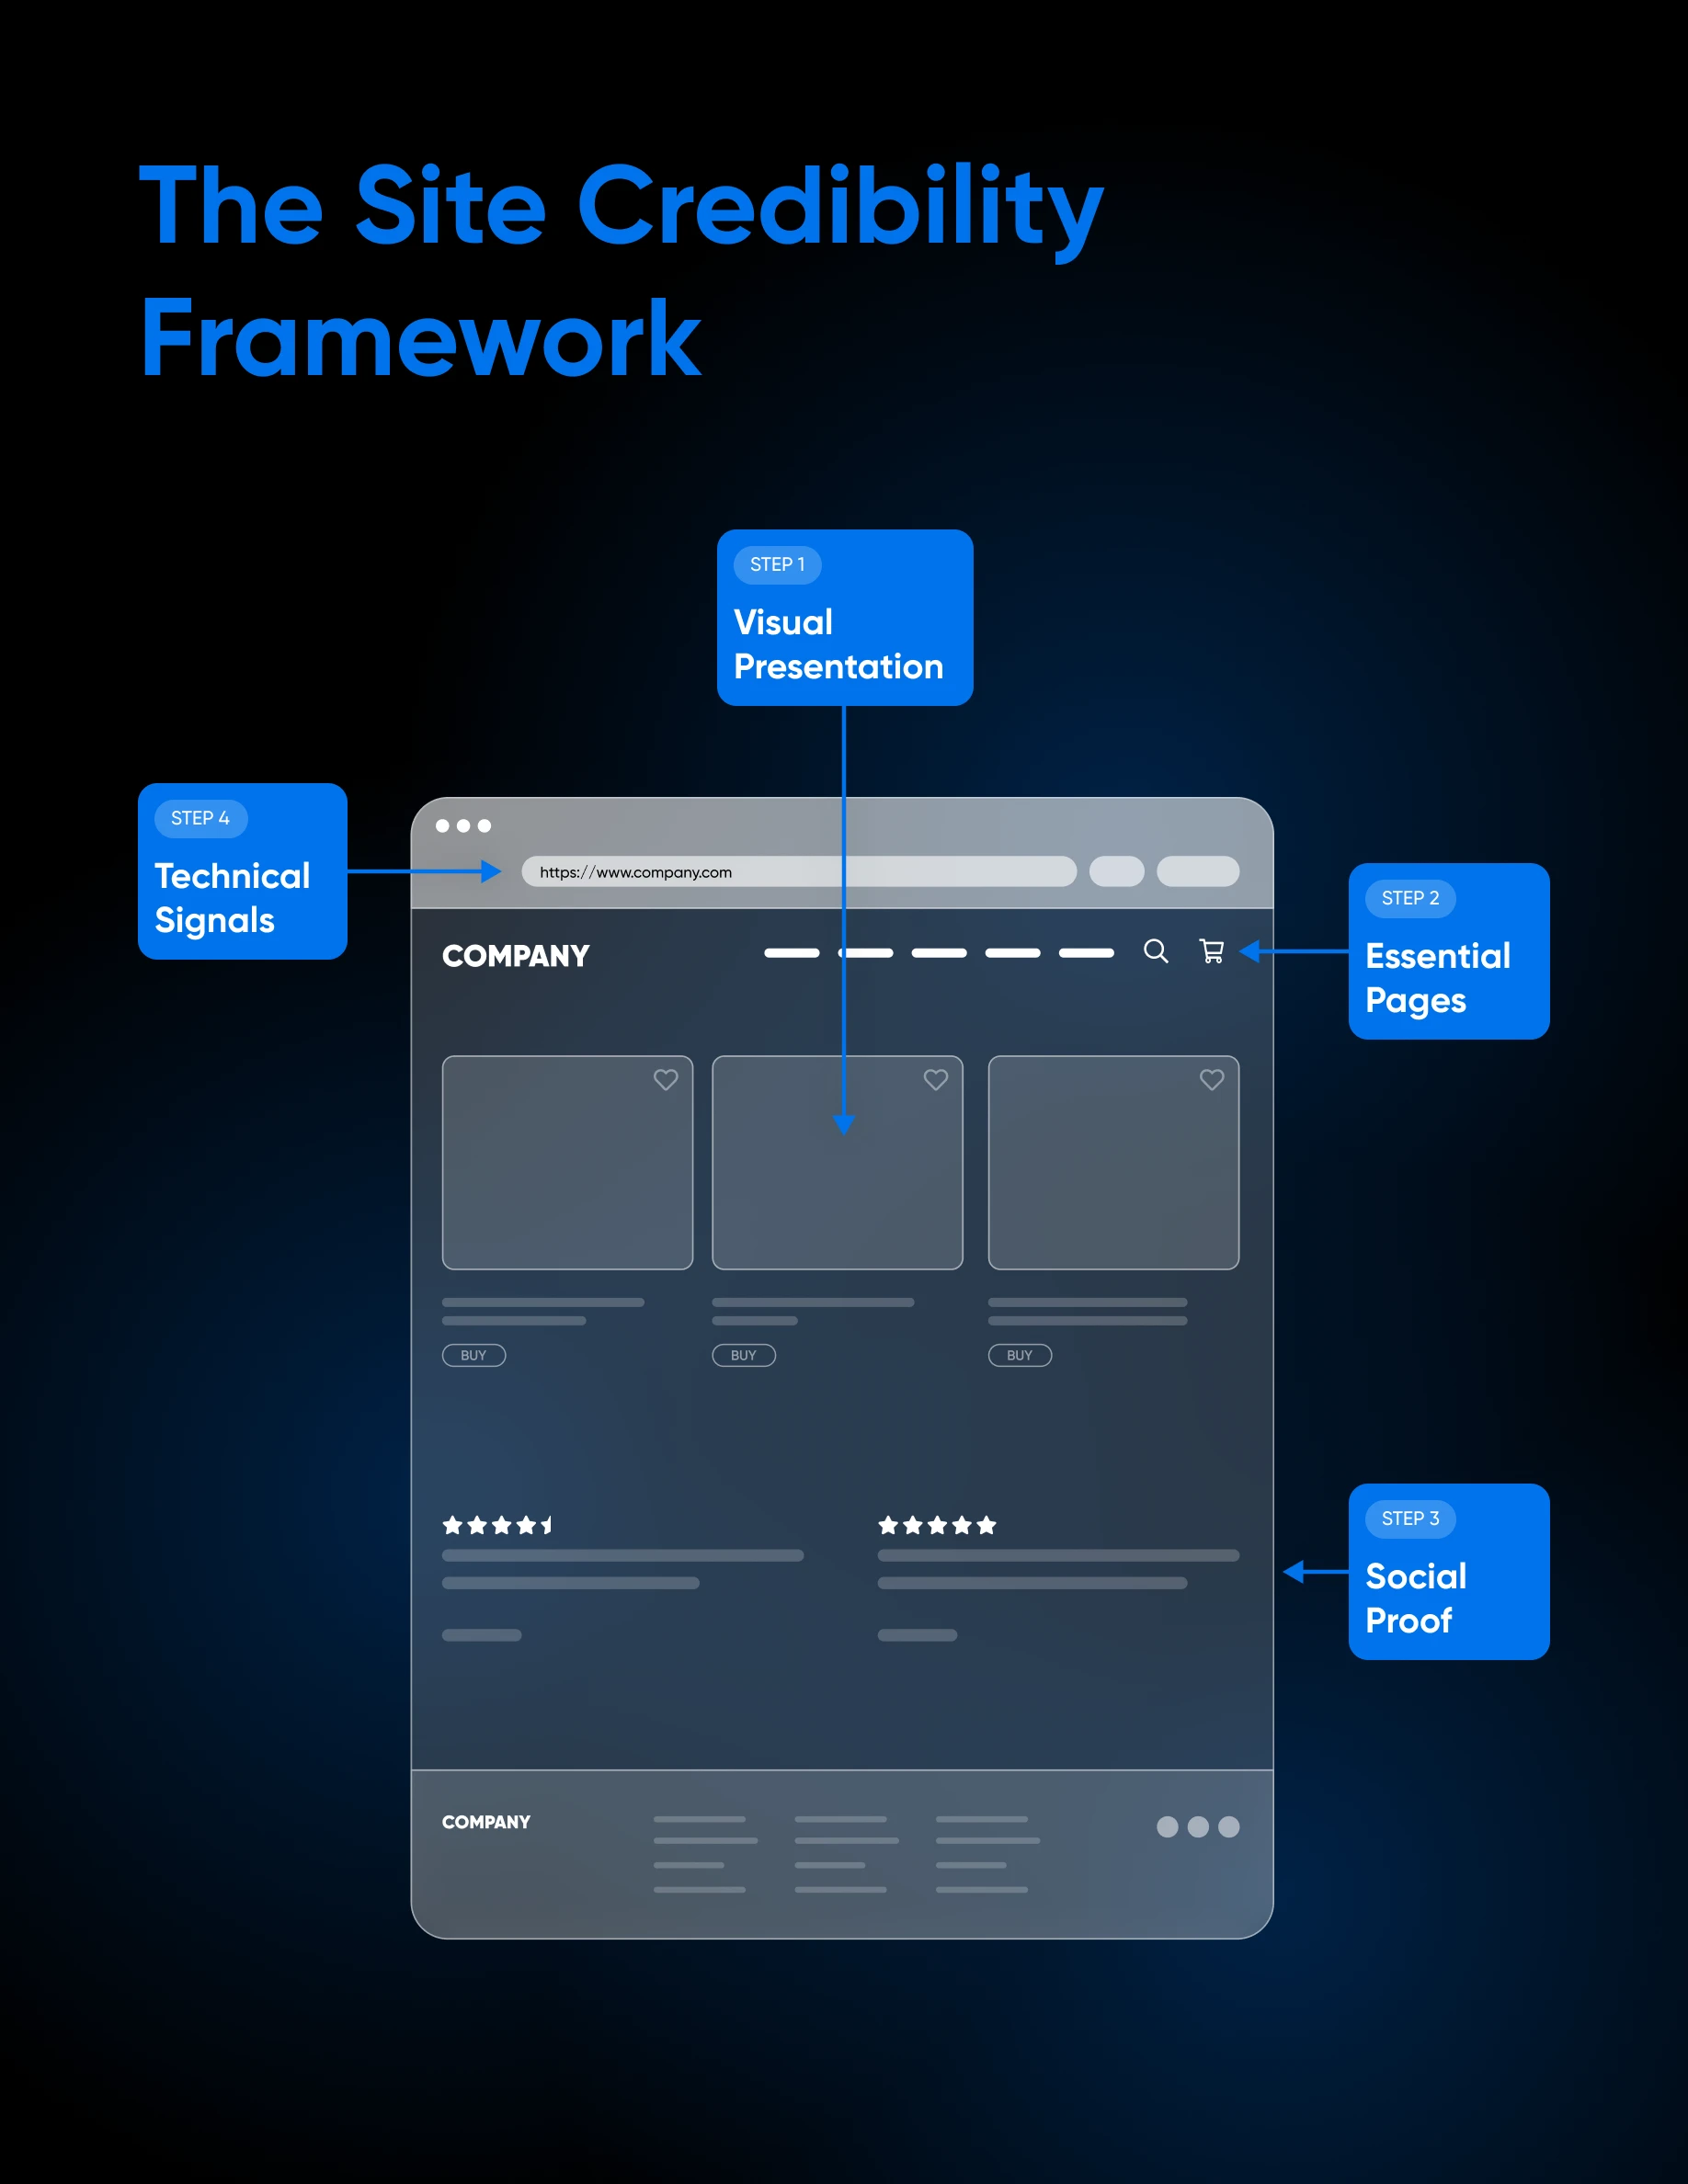
[Download] 2026 Website Credibility Playbook
Is Your Website Driving Potential Customers Away?
First impressions happen in under 50 milliseconds. This 42-page playbook gives small business owners practical tactics to look as credible as the big players — no agency, no redesign budget required.
Get The Playbook
Did you enjoy this article?
